Big Boy Birthday (BBB)
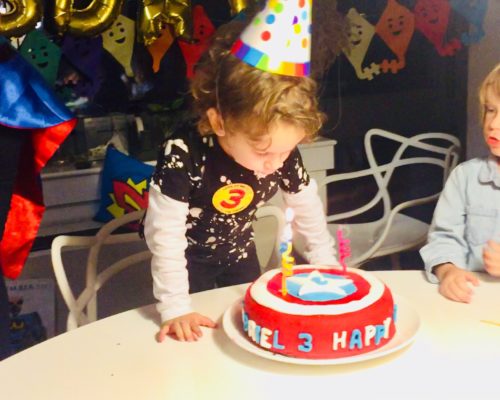
Yesterday it was my Big Boy’s Birthday (BBB) and we celebrated by throwing him a party over the weekend. Four years old!! Wow!! I completely feel like it was only yesterday that I was pregnant with him!! Time doesn’t fly, time shoots away from you at light speed!!!
Now, I’m completely opposed to spending a fortune in hiring entertainers and fancy kids birthday venues that make every birthday look the same, but upping up the ante with the previous one from last weekend. I know for a fact that most moms in my area spend upwards of $2,000 for each of their little ones’ birthdays. Well, I don’t have that kind of spare change and I also don’t want to miss on the opportunity to make my children’s birthday celebrations a family event in which everybody participates and collaborates. For starters, we have a tradition in my family: birthday cakes must be homemade with love and creativity. So I did organize a party in our building’s community Lounge and invited all of his favorite friends (another thing is I don’t invite the entire class, my Big Boy is very shy and only really likes to hang around a couple of kids from school so that’s who I’m inviting… it’s his day, I don’t want him to feel anxious around a bunch of children he doesn’t really connect with).
So I decided to make it all myself and I think besides a couple of hiccups at the beginning, everything turned out really well. I had planned a large menu to serve but ended up very short on time and only had the chance to put forward some snacks, crudités, chips and salsa, cotton candy, homemade grass feed organic beef sliders, mini hotdogs, cheeses, fruits and marshmallows, homemade cake pops (recipe to follow) and homemade cake (also recipe below). All the pizza, chocolate fondue, cold cuts, veggie meatballs, buffalo cauliflower, strawberry milkshakes and stuff that I had planned and organized went out of the window at the very last minute as the guests were arriving and I was short on time (note to self, when preparing an event outside of your own kitchen’s 5 yards radius zone of control, give yourself more than twenty minutes to decorate, set up, finalize cooking and serving food).
But even though I only was able to serve about half of what I had planned, there were still plenty of leftovers at the end and people certainly did not complain about not having enough food or variety… it’s all about the children having fun and celebrating.
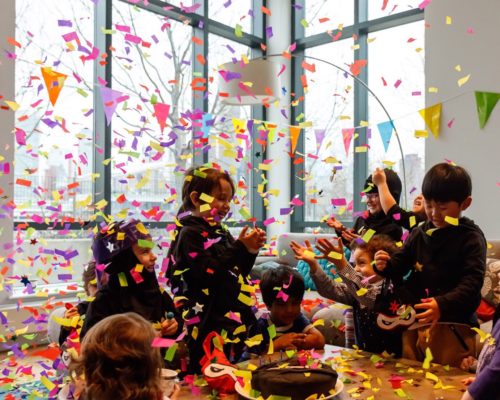
So what was the secret to my party’s success?? I prepared it with all my love, I invited close friends of mine and my Big Boy’s, I had a big piñata, cool prizes for children and gift bags that I handed out before the party was over so the kids could play together with the treats for a while… Usually treat or gift bags are handed out at the end of the party but I planned to hand them out mid-party instead and I really think it made all the difference. All I put in the bags were friendship bracelets, some cool glow in the dark temporary tattoos and I got all of them these wonderful superhero capes and masks from Amazon:

With them in hand the children let their imagination run wild and the party became a dance of superheroes flying, jumping and running to save us from the forces of evil!
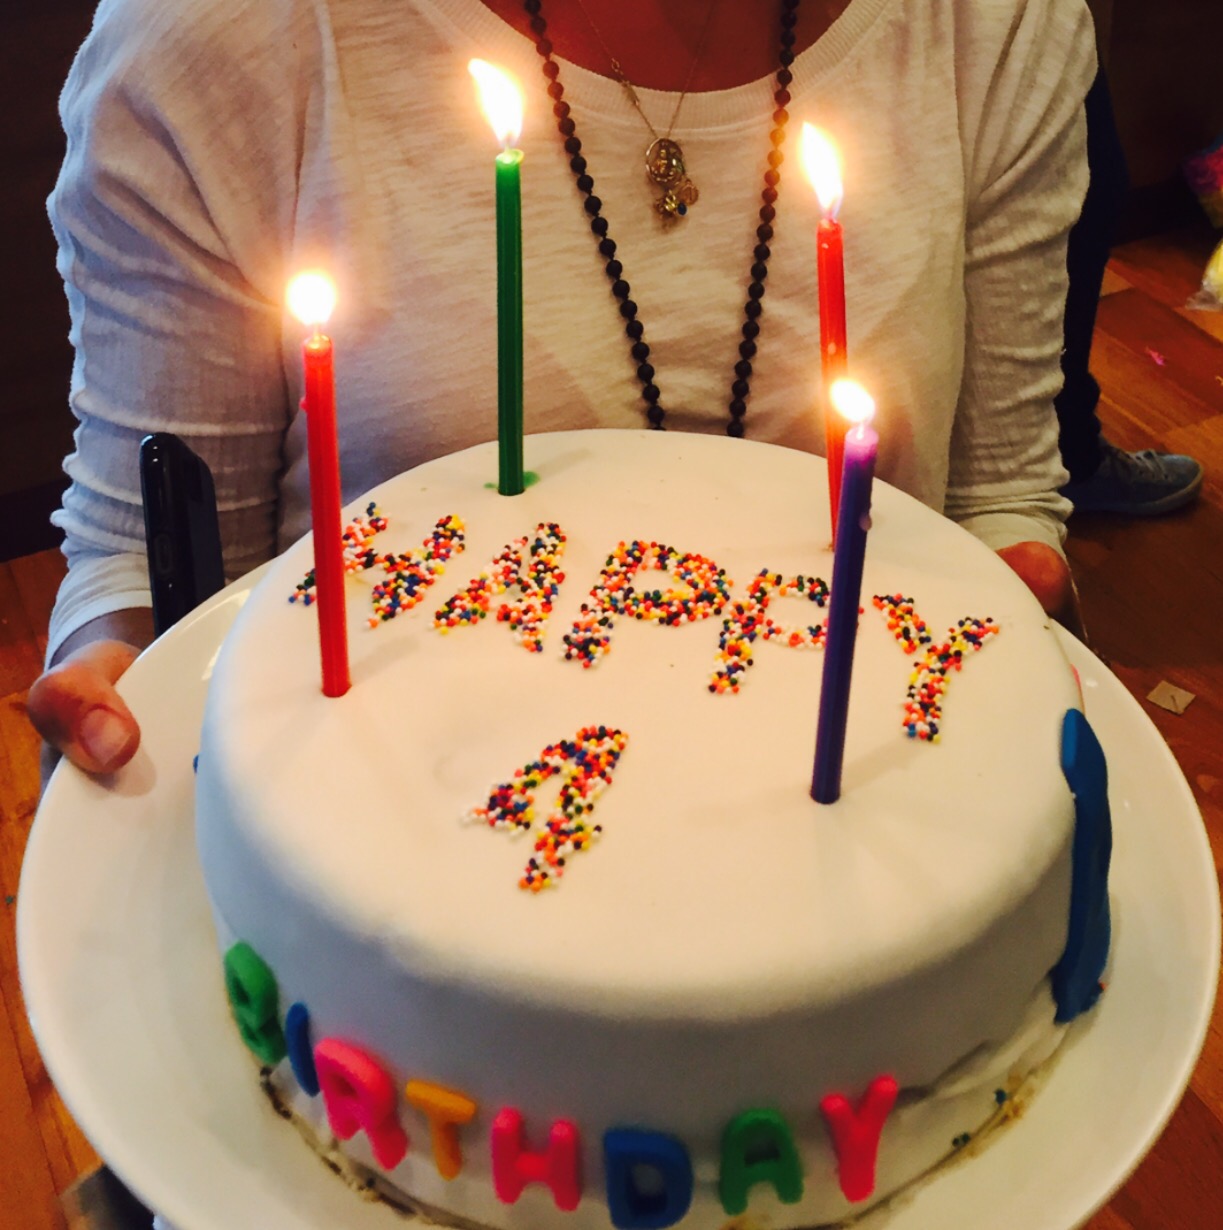
It is all about the children after all, right? With the piñata, enough sweets to keep them energized and a good gift bag that lets their imagination run wild the party was already a success! But, I must admit that I’m a bit of a Pinterest fan and I also wanted to make an impressive cake for the children to enjoy and the parents to talk about (mwaahaaahaa!!). So I decided to go for a tie dye vanilla cake with dulce de leche and cream cheese filling and fondant.
Now, since I’m pretty new at all of this, I must confess I don’t have pictures for the cake in process so bear with me and try to make an effort to picture in your heads the process… I’ll try to describe it to the best of my abilities! The cake was loosely based on some Pinterest the dye cake pins but I put it together by combining a bunch of recipes and ideas from different sources until I made it my own.
First, let’s start with the basic batter. I used a recipe for a basic white moist cake and added a few of my own twists to it:

Prep time: 15 mins
Cook time: 25 mins
Total time: 40 mins
Serves: 12
This White Cake Recipe will quickly become your favorite for so many celebrations and events. This simple white cake recipe is easy to follow and yields a moist, tender white cake you’ll love.
Ingredients
1 cup (2 sticks) butter, softened
1/2 cup vegetable shortening
2.5 cups granulated sugar
5 eggs, room temperature
3 cups all-purpose flour
2 teaspoons baking powder
1/4 teaspoon salt
1/2 cup whole milk, room temperature
1/2 cup buttermilk, room temperature
2 teaspoons vanilla extract
Instructions
Place your children on the kitchen counter with washed hands and kitchen towels as “aprons”. Preheat oven to 350º F. Have your kids prepare three 9-inch round cake pans with nonstick baking spray or coated well with shortening or butter (their hands are washed, right?) and then you flour them, taking care to remove all excess flour. I once made the mistake of dividing the batter into only two cake pans which turned out less than perfect… the batter ended up needing more time to get fully cooked throughout while the outside of the cake was overcooked and overly brown. So be careful of adjusting the amount of each ingredient accordingly if you plan on preparing a two layer only cake! That is actually a fantastic math exercise for the children… it takes them a while but when they figure it out you see magic happen!!
Cream together butter and shortening until light and fluffy with an electric mixer (they love holding the mixer and pressing the turbo button). Slowly add sugar one cup at a time, making sure to fully incorporate each cup before adding another. Add eggs one at a time, making sure to fully incorporate each egg before adding another. Remove all the egg’s shells that have fallen in while your Little Boy tried to crack open the eggs for the first time ever…oh well!
Have your kids sift together flour, baking powder, and salt. Pour milks and vanilla into measuring cup and whisk together with a fork. Add to butter and shortening mixture alternately with milk mixture, beginning and ending with dry ingredients.
Gently stir all ingredients until well combined. Stop mixer and scrape down sides and bottom of bowl, making sure to have all ingredients mixed well. Lick profusely all utensils used and make sure to take pictures of the kids getting their faces messed up with batter while doing so.

Now, I divided the batter into five bowls and mixed each bowl with bright neon food coloring (yellow, orange, hot pink, green and blue) until fully combined and perfectly homogeneous. Once the colored batters were ready, I poured them in Ziploc bags (make sure they are not the Stand and Fill kind) and sealed them well. To make the tie dye batter with all the colors combined, I cut a small corner of each bag and slowly poured the colored batter into the pregreased pans randomly, as shown in this picture from another blogger:

Evenly distribute cake batter between cake pans and place pans into oven. At this point, kids are most likely starting to get antsy, so it is the perfect time to wash their hands, faces, brush their teeth and take them to bed. The next steps are gonna get a bit more tricky so they’ll get bored anyway! Tuck them in, kiss them goodnight and go on with your cake! Bake for 25-30 minutes, or until a toothpick or cake tester inserted in the center comes out clean. Remove and allow to cool slightly in cake pans for about 5 minutes, then cool completely on a wire rack.
Since my cakes were a bit round on the top, I leveled them up with a serrated knife to make them perfectly flat and I proceeded to make the filling and frosting.
For the frosting:
4oz (half a container) of cream cheese
Half cup of sugar
Whipping cream
Dulce de leche sauce
Sprinkles.
First I whipped the cream with a little bit of sugar. Once I was able to see “peaks” I knew it had the right consistency and left it aside in the refrigerator. Then I mixed the cream cheese with the sugar until soft and fluffy using the electric mixer. Once the cream cheese was soft and fully integrated with the sugar, I folded the mix in with the whipped cream until it had the right homogeneity and softness and I folded in (carefully because the color runs) a substantial amount of the rainbow colored sprinkles.
I covered both cakes with dulce de leche caramel sauce and then for the filling I used the cream cheese sprinkles for a touch of additional color.
Once the cakes were piled on top of one another with the cream cheese filling in between and the dulce de leche sauce all around it (you have to put some frosting or sauce covering the entire cake surface so that the fondant sticks to it) I proceeded to work with the fondant. Something new I learned is that you buy the fondant already made, there is no need or really no way to make your own fondant! That took some time getting used to since I am a big believer in making everything FROM SCRATCH, but… oh well!! Sometimes you just have to give up your baking convictions in order to have an awesome looking birthday cake! So, with the store bought fondant in hand, I kneeded the fondant to warm it up with my hands and make it malleable. Once it was soft, I placed it on a clean marble counter and started extending it with a rolling pin until it was thin enough to be placed on the cake, but slightly ticker than what I wanted on the end result. I carefully grabbed it, placed it on top of my forearm and placed it on top of the cake. To make the sides stick perfectly you work the fondant by turning the cake and stretching the fondant carefully while sticking it to the sides with a spatula until it’s covering perfectly the entirety of the cake. You can search online for some YouTube videos that explain perfectly how to cover a cake with fondant, and I’m sure they’ll do a much better job at describing the process than I have so far!
I then proceeded to cut the excess fondant around the cake with a pizza cutter (I don’t have any other fancier utensils to do this) and with the excess fondant I decided to make some decorations. I split the excess fondant in five pieces, poured a drop of food coloring in each and using my hands massaged it and folded it over many times until it was perfectly homogeneous and colored. Keep in mind that just a tiny drop of food coloring goes a long way and that it’s moisture is enough to make the fondant super sticky, so make sure to place it on top of wax paper once your done and to flatten it with the rolling pin. I then grabbed my alphabet cookie cutters and once each colored fondant was flattened with the rolling pin on the wax paper, I proceeded to cut the letters for my decorations.

To stick the letters to the fondant you must moisten them slightly so they become sticky and place them carefully. I made a couple of mistakes by moisting the letters too much and they kept sliding down the sides of the cake, so be mindful about using very very little water to make them stick.
Once the side decorations were finished I took a wide turn from my original plan and decided to change the cake’s concept completely! I originally had planned to cover the fondant with rainbow colored tie dye icing… but it was late, and I was finding myself drawn to the beautiful minimalistic whiteness of the fondant… so I decided to grab by letter stencils and write on the fondant with sprinklers instead! I have a set of letter stencils that I’ve used to paint my children’s last name on their firefighters halloween costumes (here there is more material for another blog post, to be continued), so I grabbed them and an unused make up sponge (yep! Foundation sponges work great for stencils!) and proceeded to moist the fondant with a bit of water using the stencils to make it sticky enough for the sprinkles to glue themselves to the fondant…

I kept working at it carefully blowing and softly brushing away any excess sprinkles until I had my end result…


Looks good, right? And it tasted amazing!! Super soft and moist and with the cake tie dye colors when you cut it, it was a total success!!
Here is one of my Big Boy’s best friends having a go at the cake…


Next post I’ll tell you about my cake pops… another simple recipe that I served at my BBB and it was a complete success!! In the meantime… go have a blast preparing your kids birthdays, make it personal, make it a family event, indulge and enjoy the preparation, the planning and don’t let yourself be drag by the commercial machinery that surround even the purest and most basic celebrations! Let your and your children’s creativity shine through!! And have fun doing it!!